HTML Text Formatting for Beginners: Bold, Italic & More (Part 1)
Hey friend! 👋
Welcome back to our HTML Basics for Beginners series!
In Tutorial #1, you learned how to:
- Create an HTML file
- Use headings and paragraphs
- Build your first webpage 🎉
Nice job! Seriously.
But let’s be honest for a second 😄
Your page probably looked… pretty plain.
Just black text on a white background.
No bold words. No italic titles. No visual structure.
Today, we fix that.
In this tutorial, you’ll learn how to format text in HTML using simple tags that make your content look professional and easy to read.
Let’s go! 🚀
What You’ll Learn Today
By the end of this HTML text formatting tutorial, you’ll know how to:
✅ Make text bold and italic the right way
✅ Combine bold and italic formatting
✅ Underline, highlight, and resize text
✅ Show deleted and updated text
✅ Add line breaks and section dividers
✅ Build a mini project: Product sale page
Let’s make your HTML text look professional! 🚀
Before You Start
Prerequisites:
✅ Completed Tutorial #1 (HTML structure, headings, paragraphs)
✅ A text editor (VS Code, Notepad, etc.)
✅ A web browser (Chrome, Firefox, etc.)
Time to Complete: 15-20 minutes
Difficulty: Beginner-friendly ⭐
Ready? Let’s dive in!
What Is HTML Text Formatting?
HTML text formatting means using special HTML tags to change how your text looks and what it means.
For example:
- Making important words bold
- Putting book titles in italic
- Highlighting key information
- Showing price changes
- Adding line breaks
Think of it like using the formatting toolbar in Microsoft Word or Google Docs — except you’re doing it with HTML code!
Why Learn HTML Text Formatting?
Good formatting helps your readers:
✅ Find important information faster
✅ Understand your content better
✅ Enjoy reading your page
Bad formatting (or no formatting) makes pages:
❌ Look like boring walls of text
❌ Hard to scan and read
❌ Unprofessional
Let me show you the difference…
Bad Formatting vs Good Formatting (Important!)
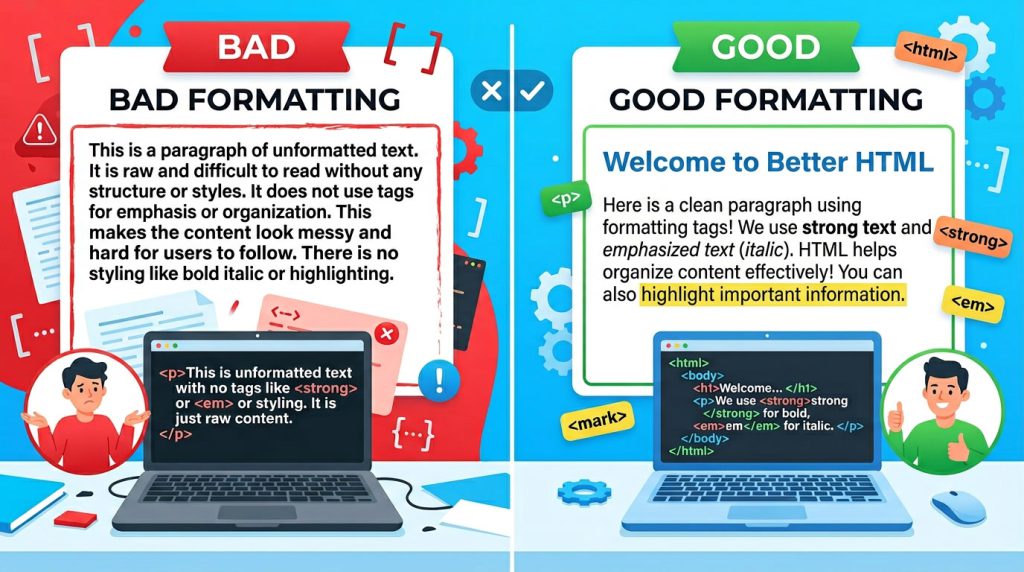
❌ Bad Example (Don’t Do This)
<h1>My Blog</h1>
<p>I love coding it is very fun and interesting and I want to learn HTML CSS JavaScript and build websites and projects</p>
Why this is bad:
- One huge paragraph
- No breaks
- Hard to read
- Nothing stands out
✅ Good Example (Much Better!)
<h1>My Blog</h1>

<p>I <strong>love</strong> coding!</p>

<p>It is <em>fun</em> and <em>interesting</em>.</p>

<p>I want to learn HTML, CSS, and JavaScript to build websites.</p>
Why this is better:
- Multiple short paragraphs
- Important words are bold
- Emphasized words are italic
- Easy to read
👉 Golden Rule: One idea = one paragraph. Use formatting to highlight what matters.
Step 1: Bold Text — <b> vs <strong>
There are two ways to make text bold in HTML, and they’re not the same!
Just Looks Bold: <b>
<p>This is <b>bold text</b>.</p>See the Pen HTML Bold Tag by Codeboid on CodePen.
Use <b> when:
- You want text to look bold visually
- There’s no special meaning
- You’re styling keywords or product names
Example:
<p>Our best-selling product is the <b>Ultra Pro 3000</b>.</p>Bold AND Important: <strong>
<p><strong>This is very important!</strong></p>See the Pen HTML Strong Tag by Codeboid on CodePen.
Use <strong> when:
- The text is actually important
- You want screen readers to emphasize it
- The meaning matters, not just the look
Example:
<p><strong>Warning:</strong> Do not skip this step!</p>💡 Quick Tip:
| Tag | Purpose | When to Use |
|---|---|---|
<b> | Visual only | Product names, keywords |
<strong> | Important meaning | Warnings, key points |
When in doubt? Use <strong> — it’s better for accessibility and SEO.
Practice Challenge 🎯
Write a paragraph about your favorite hobby and use <strong> to highlight the most important part.
Step 2: Italic Text — <i> vs <em>
Just like bold, there are two ways to make text italic in HTML.
Just Italic: <i>
<p>My favorite book is <i>Harry Potter</i>.</p>See the Pen HTML Italic Tag by Codeboid on CodePen.
Use <i> for:
- Book titles
- Movie names
- Foreign words
- Technical terms
- Thoughts (in stories)
Examples:
<p>I watched <i>The Matrix</i> last night.</p>
<p>The French word for hello is <i>bonjour</i>.</p>
<p>She thought, <i>This is amazing!</i></p>
Emphasis: <em>
<p>I <em>really</em> want to learn coding!</p>See the Pen HTML Em Tag by Codeboid on CodePen.
Use <em> when:
- You want to stress something
- The sentence meaning changes with emphasis
- You’re adding vocal stress
Examples:
<p>I <em>love</em> pizza! (stress on "love")</p>
<p><em>Please</em> read this carefully. (stress on "please")</p>
💡 Quick Tip:
| Tag | Purpose | When to Use |
|---|---|---|
<i> | Visual style | Titles, foreign words |
<em> | Emphasis/stress | Vocal emphasis, importance |
See the Difference:
<!-- Emphasis on a word -->
<p>I <em>really</em> want to learn coding!</p>

<!-- Title styling -->
<p>The movie <i>Inception</i> is mind-blowing.</p>
Practice Challenge 🎯
Write three sentences: one with a book title, one with emphasis, and one with a movie name.
Step 3: Combining Bold and Italic
You can combine tags to make text both bold AND italic!
<p>This is <strong><em>extremely important</em></strong> information!</p>See the Pen HTML Bold and Italic by Codeboid on CodePen.
Result: Text that’s both bold AND italic.
⚠️ Important Rule: Close Tags in the Right Order!
Always close tags in the reverse order you opened them (like parentheses in math).
❌ Wrong:
<strong><em>Text</strong></em>✅ Correct:
<strong><em>Text</em></strong>Think of it like boxes:
- You open the strong box
- Then you open the em box inside it
- You close the em box first
- Then you close the strong box
Step 4: Underline, Highlight & Small Text
Underline: <u>
<p><u>This text is underlined</u></p>See the Pen HTML Underline by Codeboid on CodePen.
⚠️ Use sparingly! Underlined text looks like a link, which can confuse readers.
Good use cases:
- Highlighting text in educational documents
- Showing corrections in drafts
- Special formatting (when CSS isn’t available)
Highlight Text: <mark>
<p>This is <mark>very important</mark> information.</p>See the Pen HTML Mark Tag by Codeboid on CodePen.
Looks like a yellow highlighter 🖍️
Great for:
- Search results (highlighting keywords)
- Important notes in tutorials
- Drawing attention to key information
Example:
<p>The exam date is <mark>May 15th</mark>. Don't forget!</p>Small Text: <small>
<p><small>Terms and conditions apply.</small></p>See the Pen HTML Small Tag by Codeboid on CodePen.
Used for:
- Legal disclaimers
- Copyright notices
- Side notes
- Footnotes
Example:
<p>Buy now for only $99! <small>Shipping not included.</small></p>Practice Challenge 🎯
Create a product announcement with a highlighted feature and a small disclaimer.
Step 5: Showing Changes — Deleted & Inserted Text
Sometimes you want to show what changed on your page, not just remove old text completely.
Deleted Text: <del>
<p><del>Old price: $100</del></p>See the Pen HTML Del Tag by Codeboid on CodePen.
What it does:
- Shows text with a line through it
- Means: “This is no longer valid”
When to use <del>:
- Old prices
- Outdated information
- Corrected mistakes
💡 Think of <del> as saying:
“This was here before, but it’s wrong now.”
Inserted Text: <ins>
<p><ins>New price: $80</ins></p>See the Pen HTML Ins Tag by Codeboid on CodePen.
What it does:
- Shows new or added text
- Usually appears underlined
When to use <ins>:
- New information
- Updates
- Corrections
💡 Think of <ins> as saying:
“This is the new, correct version.”
Using <del> + <ins> Together (Very Common!)
<p>
  <del>Original price: $100</del><br>
  <ins>Sale price: $80</ins>
</p>See the Pen HTML Del and Ins by Codeboid on CodePen.
This clearly shows:
- What changed
- What’s correct now
Perfect for:
- E-commerce sites (price changes)
- Blog updates
- Revision history
- Change logs
Strikethrough Text: <s>
<p><s>This offer is no longer available</s></p>See the Pen HTML S Tag by Codeboid on CodePen.
Difference between <s> and <del>:
<s>→ Just visual (looks crossed out)<del>→ Semantic meaning (officially removed)
💡 Simple rule:
- Use
<del>for meaningful changes - Use
<s>for casual strikethrough
Practice Challenge 🎯
Create a sale page showing old prices crossed out with new prices.
Step 6: Line Breaks & Section Dividers
Now let’s learn how to control spacing in your HTML content.
Line Break: <br>
Use <br> when you want a new line within the same paragraph.
<p>
  Roses are red,<br>
  Violets are blue,<br>
  HTML is easy,<br>
  And you know it too! 😄
</p>See the Pen HTML BR Tag by Codeboid on CodePen.
Think of <br> as pressing Shift + Enter.
When to use <br>:
✅ Poetry or song lyrics
✅ Addresses
✅ Short lines that belong together
When NOT to use <br>:
❌ Creating space between paragraphs (use <p> tags instead)
❌ Layout or design (that’s CSS’s job)
❌ Multiple <br><br><br> for spacing (bad practice!)
Example: Address
<p>
  Codeboid Learning Center<br>
  123 Web Developer Lane<br>
  San Francisco, CA 94102<br>
  USA
</p>
Horizontal Line: <hr>
Use <hr> to visually separate sections of your page.
<h2>Section 1</h2>
<p>Content here...</p>

<hr>

<h2>Section 2</h2>
<p>Different content here...</p>See the Pen HTML HR Tag by Codeboid on CodePen.
This adds a horizontal line (divider).
Great for:
- Separating different topics
- Blog post sections
- Visual breaks
- Before/after footer content
Example:
<h1>My Blog Post</h1>
<p>Introduction goes here...</p>

<hr>

<h2>Main Content</h2>
<p>Main content goes here...</p>

<hr>

<footer>
  <p>Copyright 2024</p>
</footer>
Practice Challenge 🎯
Write a two-verse poem using <br> for line breaks, with an <hr> separating the verses.
Step 7: Mini Project — Flash Sale Page
Time to put everything together!
Let’s build a real product sale page using all the HTML text formatting tags you just learned.
Create a file called sale-page.html:
<!DOCTYPE html>
<html lang="en">
<head>
  <meta charset="UTF-8">
  <meta name="viewport" content="width=device-width, initial-scale=1.0">
  <title>Flash Sale - Ultra Wireless Headphones</title>
</head>
<body>

<h1>🎉 Flash Sale Alert! 🎉</h1>

<p>
  <strong>Limited Time Offer!</strong><br>
  <em>Only 24 hours remaining</em>
</p>

<hr>

<h2>Featured Product: <i>Ultra Wireless Headphones Pro</i></h2>

<p>
  Experience <mark>crystal-clear sound quality</mark> with our premium wireless headphones.
</p>

<p>
  <strong>Amazing Features:</strong><br>
  <b>30-hour</b> battery life<br>
  <b>Active noise</b> cancellation<br>
  <b>Premium comfort</b> padding<br>
  <b>Bluetooth 5.0</b> connectivity
</p>

<hr>

<h2>Pricing</h2>

<p>
  <del>Original Price: $199.99</del><br>
  <ins>Flash Sale Price: $129.99</ins>
</p>

<p>
  <strong>You Save $70!</strong> That's <mark>35% off</mark> the regular price!
</p>

<p>
  <small>Limited stock available. Sale ends midnight tonight.</small>
</p>

<hr>

<h2>Order Information</h2>

<p>
  <strong>Free shipping</strong> on all orders over $100<br>
  <em>30-day money-back guarantee</em>
</p>

<p>
  <small>Terms and conditions apply. See website for details.</small>
</p>

<hr>

<h2>Contact Us</h2>

<p>
  TechStore Headquarters<br>
  123 Tech Avenue<br>
  San Francisco, CA 94105<br>
  USA
</p>

<p>
  Email: <b>sales@techstore.com</b><br>
  Phone: <b>1-800-TECH-123</b>
</p>

<hr>

<footer>
  <p><small>All prices in USD. <s>Previous promotions</s> no longer valid. Copyright 2024 TechStore.</small></p>
</footer>

</body>
</html>
What’s Happening in This Code:
✅ <strong> for important information (limited time, savings)
✅ <em> for emphasis (urgency)
✅ <i> for product name (title styling)
✅ <mark> to highlight key features
✅ <b> for visual emphasis (specs)
✅ <del> + <ins> to show price change
✅ <small> for disclaimers
✅ <s> for expired offers
✅ <br> for addresses and contact info
✅ <hr> to separate sections
Your Turn! 🎯
Customize this page:
- Change the product to something you would sell
- Add your own product features
- Create a different sale price
- Update the contact information
- Add more sections if you want!
👉 Save it and open it in your browser!
If you can read through the HTML and understand what each tag does — you’ve mastered HTML text formatting! 👏
HTML Text Formatting Cheat Sheet
Quick reference for all the tags you learned today:
BOLD & ITALIC
<strong>text</strong>    → Bold (important)
<b>text</b>              → Bold (visual only)
<em>text</em>            → Italic (emphasis)
<i>text</i>              → Italic (visual only)

HIGHLIGHTING & SIZING
<mark>text</mark>        → Highlight (yellow)
<u>text</u>              → Underline
<small>text</small>      → Small text

SHOWING CHANGES
<del>text</del>          → Deleted
<ins>text</ins>          → Inserted
<s>text</s>              → Strikethrough

SPACING & DIVIDERS
<br>                     → Line break
<hr>                     → Horizontal line
💾 Save this as a reference!
Quick Recap: What You Learned Today
✅ How to make text bold with <b> and <strong>
✅ How to make text italic with <i> and <em>
✅ How to combine bold and italic
✅ How to highlight text with <mark>
✅ How to show changes with <del> and <ins>
✅ How to add line breaks with <br> and dividers with <hr>
✅ Built a complete flash sale page project
Great job! 🎉
Common Beginner Mistakes (And How to Avoid Them)
❌ Making everything bold → Only bold what’s actually important
❌ Using <br> for spacing between paragraphs → Use <p> tags instead
❌ Underlining text that’s not a link → Confuses users
❌ Closing tags in wrong order → Always close inner tags first
❌ Using <i> for emphasis → Use <em> for vocal stress
If you’ve made any of these mistakes — that’s totally normal! Everyone does when they’re learning. 😊
Practice Challenge 💪
Before moving to Part 2, create a page about your favorite movie that includes:
- Movie title in
<i>italic - Your rating in
<strong>bold - A key scene highlighted with
<mark> - Theater information with
<br>line breaks - Ticket prices (old price with
<del>, new price with<ins>) - Sections separated with
<hr>
The more you practice, the better you’ll get!
Get the Source Code
You can find all the code from this tutorial on GitHub:
Download the complete sale page example and practice files!
Final Thoughts
You just learned the fundamental HTML text formatting tags used on every professional website!
These simple tags are powerful:
- E-commerce sites use
<del>and<ins>for sales - News sites use
<strong>and<em>for emphasis - Tutorial sites use
<mark>to highlight - Every site uses
<br>and<hr>for structure
Practice by creating different pages:
- Sale announcements
- Event invitations
- Product descriptions
- Blog posts
- Movie reviews
Keep going — you’re building real web development skills! 💪
What’s Next?
Coming Up in Part 2:
In the next tutorial, you’ll learn:
- How to add quotes and citations
- How to display code snippets
- How to use special characters (©, ®, €)
- How to use subscript and superscript
- Mini project: Book review page
See you in there! 🌱