How to Use HTML Attributes — HTML Tutorial #3 for Beginners
Hey friend! 👋
Welcome back to the HTML Basics for Beginners series!
In Tutorial #2.1, you learned how to format text — quotes, code snippets, special characters, and more. Your pages are starting to look really solid! 😄
But here’s something you might be wondering…
So far, our HTML tags look like this:
<p>Hello, world!</p>
<h1>My Page</h1>
They work — but they’re pretty plain. They just show up and do their basic job.
What if you want to give an element a name? Or add a small tooltip? Or tell the browser that a button should be turned off?
You need something extra. And that something extra is called an attribute.
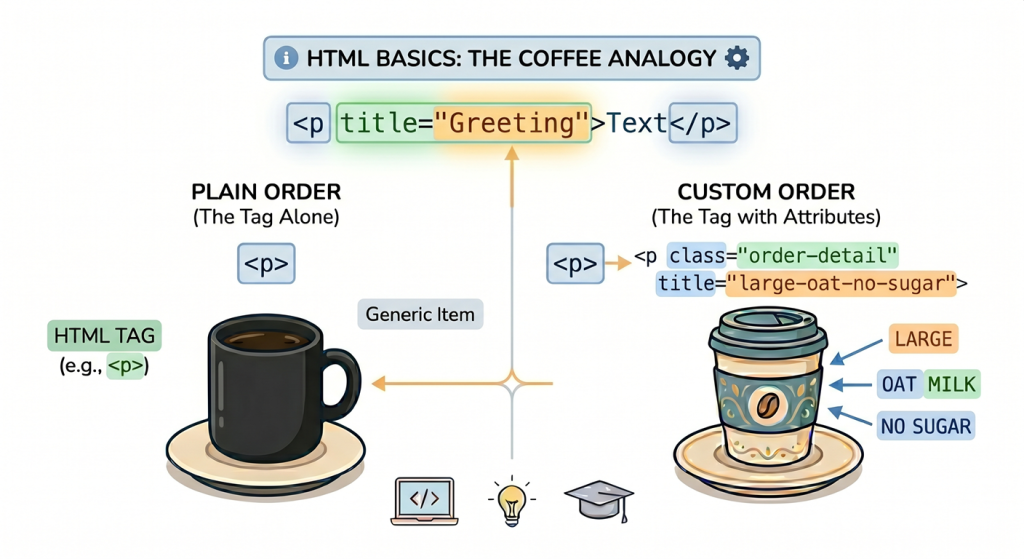
Think of it like ordering a coffee. ☕
“Coffee” is the order — that’s your HTML tag.
“Large, oat milk, no sugar” is the extra detail — that’s your attribute.
Same coffee. Totally different result.
And today, you’re going to learn exactly how they work. 🚀
What You’ll Learn Today about HTML Attributes
By the end of this tutorial, you’ll be able to:
✅ Explain what HTML attributes are and why they exist
✅ Write attributes using the correct name="value" syntax
✅ Recognise common element-specific attributes like href, src, and alt
✅ Use global attributes like style, title, class, and id
✅ Understand boolean attributes — the on/off switches of HTML
✅ Follow best practices for writing clean, professional HTML
Let’s go! 🔥
Before You Start
Prerequisites:
✅ Completed Tutorial #2.1 — HTML Text Formatting: Quotes, Code & Special Characters
✅ A text editor (VS Code, Notepad, etc.)
✅ A web browser (Chrome, Firefox, etc.)
Ready? Let’s dive in!
Why HTML Attributes Matter
Before we touch any code, let’s understand why attributes exist in the first place.
Imagine you’re giving someone directions.
You could say: “Go to the store.”
That works — but it’s vague. Which store? How far? Which road?
Now try: “Go to the grocery store on Main Street, 2km away, on the left side.”
Much better. The extra details make the instruction useful.
That’s exactly what HTML attributes do for HTML tags.
The tag says what the element is. The attribute says how it should behave.
<!-- The tag alone — just shows up, nothing special -->
<p>Hello, world!</p>

<!-- The tag + attribute — now it has a tooltip on hover! -->
<p title="This is a greeting">Hello, world!</p>See the Pen Codeboid – HTML Tutorial #3 — Attributes by Codeboid (@Codeboid) on CodePen.
Same tag. Same text. But the second one does something extra — hover over it in your browser and you’ll see a little tooltip pop up!
The attribute is what gives it that extra behaviour.
💡 Simple mental model:<tag> = the whatattribute="value" = the how
Step 1: What Are HTML Attributes?
HTML attributes are extra instructions you place inside an HTML tag.
They give the browser more information about how to display or handle that element.
Here’s the most important rule to remember:
🚨 Attributes always go inside the opening tag — never the closing tag.
<!-- ✅ Correct — attribute in the opening tag -->
<p title="This is a paragraph">Hello, world!</p>

<!-- ❌ Wrong — never put attributes in the closing tag -->
<p>Hello, world!</p title="This is a paragraph">
Simple, right? Let’s look at the format next.
HTML Attribute Syntax: name="value"
Almost every attribute follows the same simple format:
name="value"- name → what you want to adjust (e.g.
id,class,title) =→ connects the name to the value- “value” → the setting you want to apply (always wrapped in double quotes)
Here’s a real example:
<p id="intro" class="highlight" title="Welcome message">
  Hello, world!
</p>See the Pen Codeboid – HTML Tutorial #3 — Attributes # 2 by Codeboid (@Codeboid) on CodePen.
Let’s break it down:
| Attribute | Name | Value |
|---|---|---|
id="intro" | id | intro |
class="highlight" | class | highlight |
title="Welcome message" | title | Welcome message |
One tag, three attributes — each one adding a specific piece of information. Easy! 😄
Multiple Attributes on One Tag
You can add as many attributes as you need on one tag. Just separate them with a space:
<h1 id="page-title" class="main-heading" title="Welcome!">
  My Page
</h1>See the Pen Codeboid – HTML Tutorial #3 — Attributes # 3 by Codeboid (@Codeboid) on CodePen.
The order doesn’t matter to the browser — but being consistent makes your code easier to read.
Practice Challenge 🎯
Look at this tag and name every attribute and its value:
<p id="about" class="intro-text" title="About this page">
  This is my webpage.
</p>
Then try writing your own <h2> tag with at least two attributes.
Step 2: A Quick Peek — Element-Specific Attributes
Not all attributes are universal. Some are built to work with specific tags only.
You’ll learn these in full detail in the upcoming tutorials — but it’s good to know they exist right now, so nothing feels mysterious when you see them. 👇
href— used with<a>to set where a link goes. ➡️ Tutorial #4: How to Add Links in HTMLsrc— used with<img>to tell the browser where the image file is. ➡️ Tutorial #5: How to Add Images in HTMLalt— used with<img>to describe the image in words. ➡️ Tutorial #5: How to Add Images in HTMLwidthandheight— used with<img>to set the display size. ➡️ Tutorial #5: How to Add Images in HTML
No need to memorise these right now — just know they exist.
You’ll get hands-on practice with every single one very soon! 🚀
Step 3: Global Attributes — The Multitaskers
Here’s where it gets really interesting.
Global attributes are special — they work on almost any HTML element, not just specific ones.
Think of them as tools you can reach for on any tag, any time. 🛠️
The four most useful ones for beginners are: style, title, class, and id.
Let’s go through each one.
The title Attribute — Tooltip on Hover
The title attribute adds a small tooltip that pops up when a user hovers their mouse over an element.
<p title="This is extra info!">Hover over me slowly...</p>

<h2 title="This is the about section">About Me</h2>
Try it in your browser right now — hover your mouse slowly over the element and watch the tooltip appear!
See the Pen Codeboid – HTML Tutorial #3 — Title Attributes by Codeboid (@Codeboid) on CodePen.
It works on paragraphs, headings, buttons — anything. 😎
💡 Best for: Adding helpful hints or extra context without cluttering the page.
Practice Challenge 🎯
Add a title tooltip to three different elements — a heading, a paragraph, and a button:
<h1 title="Welcome to my page">My Website</h1>
<p title="This is the introduction">Hello there!</p>
<button title="Click to continue">Next</button>
Open it in your browser and hover over each one!
The style Attribute — Quick Inline Styling
The style attribute lets you add a visual style directly to any element. Basically, we add CSS using the style attribute.
<p style="color: red;">This text is red!</p>
<h2 style="color: blue;">This heading is blue!</h2>See the Pen Codeboid – HTML Tutorial #3 — Style Attributes by Codeboid (@Codeboid) on CodePen.
🙋 New to CSS? Don’t worry about what’s inside the quotes just yet — things like
color: redcome from CSS, which we’ll cover fully in a later tutorial. For now, just focus on how to write thestyleattribute. You can copy the examples as-is and experiment! We’ll explain everything inside the quotes when we get to CSS. 😊
You can also combine multiple styles by separating them with a semicolon ;:
<p style="color: white; background-color: black;">
  White text on a black background!
</p>See the Pen Codeboid – HTML Tutorial #3 — Style Attributes # 2 by Codeboid (@Codeboid) on CodePen.
⚠️ Good to know: The
styleattribute is great for learning and quick experiments. But in real projects, styles usually live in a separate CSS file — we’ll get to that later in the series!
Practice Challenge 🎯
Try changing the colour of a heading and a paragraph:
<h1 style="color: darkblue;">My Blue Heading</h1>
<p style="color: green;">My green paragraph!</p>
Play around with different colour names — red, orange, purple, pink. Have fun with it! 🎨
The class Attribute — A Reusable Label
The class attribute gives an element a label — and the same label can be used on as many elements as you want.
<p class="highlight">This paragraph is labelled "highlight".</p>
<p class="highlight">So is this one!</p>
<p>But not this one.</p>See the Pen Codeboid – HTML Tutorial #3 — Class Attributes # 1 by Codeboid (@Codeboid) on CodePen.
Right now the label doesn’t change how it looks — but when you learn CSS later, you’ll be able to style all elements with the same class at once. Super powerful! 💪
One element can also have multiple classes — just separate them with a space:
<p class="highlight large bold">This has three class labels!</p>See the Pen Codeboid – HTML Tutorial #3 — Class Attributes # 2 by Codeboid (@Codeboid) on CodePen.
💡 Think of class as: A label on a group of students wearing the same uniform. One label, many students.
Practice Challenge 🎯
Give three paragraphs the same class name, and one paragraph a different class:
<p class="intro">First paragraph.</p>
<p class="intro">Second paragraph.</p>
<p class="intro">Third paragraph.</p>
<p class="note">This one is different.</p>
The id Attribute — A Unique Name
The id attribute gives an element a unique name. Unlike class, no two elements on the same page should share the same id.
<h1 id="page-title">Welcome to My Page</h1>
<p id="intro-text">This is the introduction.</p>See the Pen Codeboid – HTML Tutorial #3 — ID Attributes # 1 by Codeboid (@Codeboid) on CodePen.
The label doesn't change how it looks. However, id is useful for:
- CSS — styling one specific element
- JavaScript — targeting one specific element
- In-page links — jumping to a section on the page when clicked
<!-- Clicking this jumps to the "about" section -->
<a href="#about">Go to About Section</a>

<!-- The line breaks below push the "About Me" section further down
     so you can actually see the page jump when you click the link! -->
<br><br><br><br><br><br><br><br><br><br>
<br><br><br><br><br><br><br><br><br><br>
<br><br><br><br>

<!-- This is the section it jumps to -->
<h2 id="about">About Me</h2>See the Pen Codeboid – HTML Tutorial #3 — ID Attributes # 2 by Codeboid (@Codeboid) on CodePen.
class vs id — What’s the Difference?
class | id | |
|---|---|---|
| Can multiple elements share it? | ✅ Yes | ❌ No — must be unique |
| Can one element have multiple? | ✅ Yes | ❌ Only one per element |
| Used for | Styling groups, targeting groups | Styling single element, targeting one specific element |
💡 Simple way to remember:class = a school uniform — many students wear the same oneid = a student ID card — every student has a unique one
Practice Challenge 🎯
Add a unique id to the heading and a shared class to both paragraphs:
<!-- Before -->
<h1>My Webpage</h1>
<p>First paragraph.</p>
<p>Second paragraph.</p>

<!-- After -->
<h1 id="main-title">My Webpage</h1>
<p class="body-text">First paragraph.</p>
<p class="body-text">Second paragraph.</p>
Step 4: Boolean Attributes — The On/Off Switches
These are a little different — and honestly, they’re kind of fun. 😄
Boolean attributes don’t follow the name="value" format. They work like a light switch:
- Present in the tag → the feature is ON
- Missing from the tag → the feature is OFF
No value needed. Just the word itself!
disabled — Turn Off a Button
<!-- Normal button — works fine -->
<button>Click Me</button>

<!-- Disabled button — greyed out, can't be clicked -->
<button disabled>Can't Click Me</button>
You don’t write disabled="true". Just disabled is enough!
See the Pen Codeboid – HTML Tutorial #3 — Disabled Attribute by Codeboid (@Codeboid) on CodePen.
required — Make a Field Mandatory
<form>
  <input type="text" placeholder="Your name" required>
  <button type="submit">Submit</button>
</form>
Try leaving the field empty and clicking Submit — the browser won’t let you through! 🙅
See the Pen Codeboid – HTML Tutorial #3 — Required Attribute by Codeboid (@Codeboid) on CodePen.
📌 Note: You’ll notice we’re using
<input>and<form>here to show the boolean attribute in action. We’ll cover these elements and forms in full detail in a later tutorial — so don’t worry about them too much right now!
readonly — Show It But Lock It
<input type="text" value="You can read this but not edit it" readonly>See the Pen Codeboid – HTML Tutorial #3 — Readonly Attribute by Codeboid (@Codeboid) on CodePen.
📌 Note: Same here —
<input>is just being used to demonstratereadonly. Full forms tutorial coming soon!
checked — Pre-tick a Checkbox
<input type="checkbox" checked> I agree to the termsSee the Pen Codeboid – HTML Tutorial #3 — Checked Attribute by Codeboid (@Codeboid) on CodePen.
All Boolean Attributes at a Glance
<button disabled>Disabled Button</button>
<input type="text" required>
<input type="text" readonly>
<input type="checkbox" checked>
💡 Think of boolean attributes as: A checkbox. Either it’s ticked ✅ or it’s not. No in-between.
Practice Challenge 🎯
Create a small form with all four boolean attributes:
<p>Required field:</p>
<input type="text" placeholder="Your name" required>

<p>Read-only field:</p>
<input type="text" value="Cannot edit this" readonly>

<p>Pre-ticked checkbox:</p>
<input type="checkbox" checked> Subscribe to newsletter

<p>Disabled button:</p>
<button disabled>Submit</button>
Open it in your browser and interact with each one. Notice what they do! 👀
Step 5: Best Practices for Writing Clean Code
You now know how attributes work. Let’s make sure you write them the right way from day one.
These small habits will make your code look professional and avoid headaches later. 🧹
✅ Always Write Attribute Names in Lowercase
HTML doesn’t force you to do this — but lowercase is the standard that every developer follows.
<!-- ❌ Avoid — works but looks sloppy -->
<p TITLE="hello" CLASS="intro">Hello</p>

<!-- ✅ Always do this -->
<p title="hello" class="intro">Hello</p>
✅ Always Wrap Values in Quotes
Always use double quotes around attribute values. Single quotes work too — but double quotes are the standard.
<!-- ❌ No quotes — can break in some browsers -->
<p id=intro class=highlight>Hello</p>

<!-- ✅ Double quotes — always do this -->
<p id="intro" class="highlight">Hello</p>

<!-- ✅ Single quotes — useful when the value contains double quotes -->
<p title='She said "Hello!"'>Hover over me</p>
✅ One Space Between Attributes
Keep one clean space between each attribute. Don’t cram them together.
<!-- ❌ Hard to read -->
<p id="intro"class="highlight"title="Hello">Welcome</p>

<!-- ✅ Clean and easy to read -->
<p id="intro" class="highlight" title="Hello">Welcome</p>
✅ Attributes Go in the Opening Tag Only
We covered this in Step 1, but it’s worth saying again — never put attributes in the closing tag.
<!-- ❌ Wrong -->
<p>Hello</p class="intro">

<!-- ✅ Correct -->
<p class="intro">Hello</p>
Best Practices Summary
| Rule | ❌ Avoid | ✅ Do This |
|---|---|---|
| Case | TITLE="..." | title="..." |
| Quotes | id=intro | id="intro" |
| Spacing | id="a"class="b" | id="a" class="b" |
| Placement | Attribute in closing tag | Attribute in opening tag only |
Mini Project — Attributes Practice Page 🛠️
Let’s put everything together and build a small practice page.
Create a new file called attributes-practice.html and type this out:
<!DOCTYPE html>
<html lang="en">
<head>
<meta charset="UTF-8" />
<meta name="viewport" content="width=device-width, initial-scale=1.0" />
<title>HTML Attributes Practice</title>
</head>
<body>
<!-- id and style -->
<h1 id="page-title" style="color: darkblue;">My Attributes Practice Page</h1>
<!-- title tooltip -->
<p title="This is the introduction">
Hover over this paragraph to see a tooltip! 👆
</p>
<!-- class on multiple elements -->
<h2>My Favourite Things</h2>
<p class="favourite">I love coding!</p>
<p class="favourite">I love music!</p>
<p class="favourite">I love travel!</p>
<hr>
<!-- Boolean attributes -->
<h2 id="boolean-section">Boolean Attributes</h2>
<p>Required field — try clicking Submit without typing anything:</p>
<form>
<input type="text" placeholder="Your name" required>
<button type="submit">Submit</button>
</form>
<p>Read-only field — try editing it:</p>
<input type="text" value="This is read-only" readonly>
<p>Pre-ticked checkbox:</p>
<input type="checkbox" checked> I agree to the terms
<p>Disabled button:</p>
<button disabled>Can't Click Me</button>
<hr>
<p><small>Copyright © 2026 My Attributes Page</small></p>
</body>
</html>What’s Happening Here?
✅ id="page-title" → unique name for the heading
✅ style="color: darkblue;" → quick colour (CSS syntax — we’ll cover this soon!)
✅ class="intro-text" → reusable label on the paragraph
✅ title="..." → tooltip appears on hover
✅ class="highlight" on two paragraphs → same label on both
✅ required → field must be filled before submitting
✅ readonly → visible but not editable
✅ checked → checkbox is pre-ticked
✅ disabled → button is turned off
Your Turn! 🎯
Customise this page:
- Change
style="color: darkblue;"on the heading to your favourite colour - Add a
titletooltip to the<h2>heading - Add a third paragraph with
class="highlight" - Add a new input with
readonlyand any value you like
Full Cheat Sheet (Save This!)
── ATTRIBUTE SYNTAX ───────────────────────────────────────────────

name="value"                      → Standard format
<tag name="value">Content</tag>   → Attributes go in the OPENING tag only

── ELEMENT-SPECIFIC ATTRIBUTES (coming in upcoming tutorials) ─────

href="URL"        → Link destination    — Tutorial #4: HTML Links
src="path"        → Image source        — Tutorial #5: HTML Images
alt="text"        → Image description   — Tutorial #5: HTML Images
width="pixels"    → Image width         — Tutorial #5: HTML Images
height="pixels"   → Image height        — Tutorial #5: HTML Images

── GLOBAL ATTRIBUTES (work on any element) ────────────────────────

title="text"      → Tooltip on hover
style="css"       → Inline styling (CSS — covered in a later tutorial)
class="name"      → Reusable label for CSS and JavaScript
id="name"         → Unique name for CSS, JavaScript, and in-page links

── BOOLEAN ATTRIBUTES (no value needed — just write the word!) ────

disabled          → Turns off a button or input
required          → Makes a form field mandatory
readonly          → Shows content but blocks editing
checked           → Pre-ticks a checkbox

── BEST PRACTICES ─────────────────────────────────────────────────

✅ Always lowercase     title not TITLE
✅ Always use quotes    id="intro" not id=intro
✅ Space between attrs  id="a" class="b" not id="a"class="b"
✅ Opening tag only     never put attributes in the closing tag
Quick Recap
Today you learned:
✅ Attributes are extra instructions inside the opening tag
✅ The standard syntax is name="value"
✅ Element-specific attributes like href, src, and alt exist — coming in Tutorials #4 and #5
✅ Global attributes work on any element: title, style, class, id
✅ Boolean attributes are on/off switches: disabled, required, readonly, checked
✅ Best practices: lowercase names, always quote values, one space between attributes
✅ Built a complete Attributes Practice Page
Common Mistakes to Avoid
❌ Putting attributes in the closing tag — opening tag only!
❌ Forgetting quotes around values — id=intro can break your code
❌ Using the same id on two elements — id must be unique per page
❌ Confusing class and id — class is reusable, id is unique
❌ Writing attributes in UPPERCASE — always use lowercase
❌ Forgetting a space between attributes — id="a"class="b" will break things
❌ Writing disabled="true" — just write disabled, no value needed
Get the Source Code
You can find all the code from this tutorial on GitHub:
What’s Next?
Coming Up in Tutorial #4: How to Add Links in HTML
You’ll learn:
- How to create clickable links with
<a>andhref - How to use absolute vs. relative URLs
- How to open links in a new tab with
target - How to link to email addresses and phone numbers with
mailto:andtel: - How to write accessible link text
- Mini project: My Favorite Websites 🌐